Providing Professional, Unbiased, Quality Reviews of the Products You use Everyday
Discover Informative Articles of Reviews relating to Home and Garden, Family, and Consumer Shopping

Join KevsProReviewson

How to Measure Your Carpeting Costs before Choosing the Right Carpet

In this article we will talk about how you can do the work yourself and save big money.

Home Remedies - How To Remove Stains from Your Carpet

Maybe we can pick up a tid bit or 2 that will help us out as well. So without further growling let's get on with it and see what they are.

Miter Saw Reviews: Read My Review of the DeWalt 713 Compound Miter Saw

Enter now my review for the master craftsman carpenter in your home. My review of the Compound Miter Saw.

See Practical Ways to Furniture Upholstery Cleaning and Upholstery Fabrics

In this article I want to give you some practical ways to keeping your upholstery clean.

Discover Variations of Outdoor Carpeting on Your Deck or Patio

In this article we'll take a look at the different variations of outdoor carpeting that is available to you. This will be a benefit to you, if you are thinking of covering your:

Friday, April 22, 2011

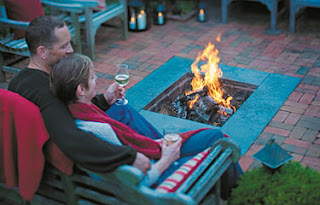
How to Build a Multi Purpose Fire Pit for Your Backyard

an in ground fire pit
Today backyard family get togethers and parties have multitudes of choices for not only things to do, but also ways to get the fun times done.  One of the things that families can do together is to build a fire and sit around playing music or chatting and even have grandpa tell a scary story or two for the kids around the fire.

Talking about building a fire is one thing, but it should be done safely. Having a fire pit is one safe way to have that fun we're talking about.  Fire pits come in many different sizes and shapes.  You can purchase them just about any where theres a discount store.


Customize It 

Or, you can build your own and have it customized to your liking.  In this guide, rather than calling it an article, I'm going to tell you how to build your own outdoor fire pit.  There are 2 types of fire pits:
  • Wood, or Charcoal burning
  • And Gas Fire Pits
The type that you will learn how to build is wood.  I'm partial to the wood or charcoal pits cause they are just better in terms of the wood smells and it looks better.  To me a gas fire outside is just fake.  But, hey they serve the purpose so whatever your choice is you can't go wrong.

Choose Your Style and Shape 

Anyways, lets get on with building our fire pit out in the backyard.  Our fire pit will be built as an "in ground" one. You can of course have an above ground one also. The style of our pit could be endless.  Specifically in terms of decoration, type of brick or stone to use with it.  Even colors are endless.  You decide on the look of your pit.

Some shapes of pits include but are not limited to:
  • Round and Bowl shaped
  • Rectangular
  • Square
  • Octagon 
  • And Pentagon shaped


Your imagination here is unlimited.  Choose your shape then determine what size you want it to be.  For this How To I will use the standard square shape.  When determining your size to build, your first idea would be to find a safe place away from your house or even your deck if it is made of wood.  We don't want any wild fires going on so we choose a place out in the middle of the yard.

A fire pit deck
If You Build It, They will come

Away from any low hanging trees or wires, bushes, etc.. Now that we've found our place to build it let's measure out a 3 foot by 3 foot square. Here again it can be as large or small as you want.  Just take safety into consideration. After our measurements for size we mark those corners of the square off.  Now before we begin to dig out our fire pit, how far down should we dig it?

Dig your fire pits no deeper than 3/4 of your arms length.  Why that deep? Because every so often you'll need to clean it out.  Clean out the ashes, dirt and so on.  This way you don't have to climb down in it to clean it out. You'll still be able to reach to the bottom of it with your arm or even a broom and pick up pan.

Using a standard garden shovel we dig our fire pit within the measurements we marked off.  Taking care to only dig about 1 1/2' deep.  Or 3/4 arms length.  After digging out your pit make sure that the sides of the pit are level and smooth. Removing any rocks or stones that would keep the sides and bottom from being level.

The reason you do this is when you place your bricks or stone in there to make the sides and bottom, it will also be level and perpendicular.  You can even use sand to help you level the bottom of it.  Now that you have your pit dug out and a big pile of dirt laying up there, its time to install the interior of the fire pit.  At this time you should already have your chosen bricks or rock or stone to use on the inside.

You can use cement to strengthen the sides and bottom of it but I don't see the need, since the fire will be in the ground anyway.  For this case we just use regular landscaping rock or brick.  Then just lay the first layer of brick in the bottom around the sides.

Now fill in the rest of the bottom or floor of the pit. To make it fit right you may have to cut some of the bricks.  Use a masonry saw for this.  Once you have your pit floor completed, begin laying and stacking the brick around the sides of the pit.

Depending on how you want to make it at the corners you can either join them together or overlap them.  But to join them you'll have to make custom cuts to the bricks.  Continue filling up the sides of the pit by stacking your bricks.

Once you've reached the top of the fire pit, you may notice that the actual fire place will be smaller.  But thats ok, we have a nice small fire pit to enjoy.  From here you can do things like creating a deck out around the fire pit.  Again your imagination is the limit.

A finished square fire pit
Wrap Up

Sounds fairly simple doesn't it.  Well it is, except for the work involved to do it.  This guide is about a 2 day project as far as the actual building of it.  In the title of this guide I mentioned a Multi Purpose Fire Pit. Not only does this pit make a cool addition to your backyard, but you can also have a custom made grill grate or rack created for it.

So you can use it to grill out on as well as a fireplace. Not to mention it works great for the kids to roast marshmallows on to.  Enjoy your new Fire Pit.


Thanks for coming by....


Monday, April 18, 2011

What is The Camping World: A Reminder

Well, its the middle of April now and I'm beginning to see Campers, Trailers, Mobilehomes, and all sorts of camping gear starting to come out of the closet.  The trees are blooming, flowers growing, and dandelions popping out on my front yard.  For me its time to get the lawnmower out.

camping grillAnyway, I love spring and the whole prelude to the summer thing, it just makes you want to wake up and get outside and do things.  Whether its working or playing or whatever you do.  Its a beautiful time of year!  One of the favorite things lots of people like to do is get out their camping supplies and fishing gear, get it ready to have some fun.


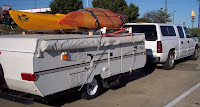
Camping is one of my favorite things to do. In fact here at my house we just bought ourselves a, I don't know, uh, camper, or mobile home, well its a camper with wheels and a motor....lets leave it at that.  I get confused between the two, camper, mobile home..whatever.

chevy and camping trailer
However, we're going to a park here in Ohio where I live, called Mt.Gilead, St.Park this year. Looking forward to getting away to the peacefulness of the park, fishing, and camping. One of the problems I have is once I get going to the camp sites, I always remember something I should have brought with me that I didn't. You ever do that to? Get half way somewhere and remember something you forgot.

Well it sux.  So what I've decided to do is make a camping checklist. This will help you to. Heres one you can download that covers everything, but one thing.  Can you guess what is?  Go ahead look - here.  Everything thats on there is what you should bring with you, most of the things the wife, girlfriend or husband/boyfriend will remember - hopefully.

enjoy a family camping tripThis is the one thing that if I forget to bring with me, not only will the other half be upset, but I will be to.  This is general camping we're talking about folks.  But its needed with every form of it, trailer, camper on wheels, and so on.


In that list is named the camping grill rack, but thats not always enough. The one thing on that list you should never forget is your Grill!  Don't get to the campsite and then realize you forgot the camping grill. Thats like getting to the lake, and realize you forgot your pole.

Here are the basic categories that you should have:

  • Shelter - of course
  • Personal Items
  • Clothing
  • Food Preparation & Cooking
  • Miscellaneous Items
  • Things For the Kids 
  • And any additional Items you can think of 

These are all necessary things for sure, but don't leave home without your grill. After all, what would a barbecue at the campsite be without a grill? They're like peanut butter and jelly, they go together.
family camping

The Moral of the thing:

So what is the idea here?  Don't forget your Camping Supplies, including your camping grill, better yet just make a checklist or get one here to your printer.  That camping checklist is a big helping reminder.  Hoping you have fun on your next camping trip...;).


Thanks for coming by....


Wednesday, April 13, 2011

Ideas To Make Your Next Tailgating Grilling Party a Fun Time

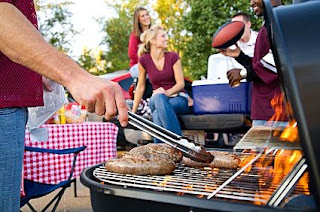
tailgating party
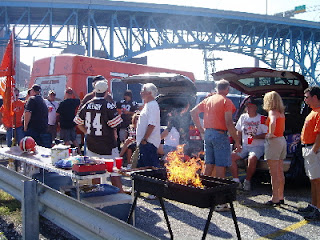
With todays many different venues of activities such as Pro Sports, College Sports, Concert venues, even a day at the park picnic venue, the tailgate party has become synonymous with them all. Heck, tailgating is even fun to do in your own backyard for that matter.

If theres a reason to have a party then theres a reason to get your grill out and lower down the pickup tailgate and git-r-done. Along with your favorite beverage and good grilled food, theres plenty of great games to be played either while watching your big game or before it or even after it as well.

We all love to have a tailgating party and thats what I'll try to do in this article is give you some good ideas and maybe even some good recipes to help you have a more fun time at your next tailgate venue.

Tailgate Definition:

Just in case someone reading this has no idea what a tailgating party is, I'll give some definition as to its meaning to get them started. A tailgate party is an event held on and around the open tailgate of a vehicle. Usually a pickup truck is the norm, but it has been done also out of the back of SUV's, the trunk or on the hood of cars as well.


It involves grilling your favorite foods. Drinking your favorite beverage and that includes adult beverages. And playing your favorite tailgating games such as Corn Hole. These are usually held in the parking lots before sporting events. Basically a fun time!

So, people that party like this are said to be tailgating. Oh, and try not to confuse this type of tailgating to following to close to the vehicle in front of you. Also known as tailgating. Thats dangerous. We're talking about having fun here folks.

tailgate party
Social Event of the Day: 

I don't think its necessary to give you any ideas to the partying aspect of tailgating, most people already know how to party and have a good time. There are 2 ideas that I can help you with to make it more fun and interesting and that is games to play and recipes to great grilling food.

Lots of times depending on the sport your at to watch such as football for example, you'll see a bunch of people playing flag football right there in the parking lot while cooking out. Same with all the other sporting events where their tailgating.

Even at a concert event people will be playing music of the band their going to see. Even playing their own instruments. It becomes a social event of fun for everyone.

Here are some other game ideas that you can play at your next event of tailgating.

  • Corn Hole - as mentioned above
  • Horse Shoes 
  • Washeroos
  • Pub Washers
  • Sholf
  • Stickzee
  • BecoBall
  • Plastic Ladder Toss

These are a few to get you started.  Can you think of anymore?  You can find out more about these games and others here http://www.tailgatingideas.com/ .  I have no affiliation with that site.

The Sweet Delights: 

Now for the best part, the food.  Of course there are many types and meats and fixin's you can have at your tailgate party.  Tailgate food can be some of the best you have eaten or some of the worst depending on how good a cook you are.  Or how good a cook your friend is that you're eating from also.

Tailgating recipes are in abundance.  In fact your imagination is the limit.  But I have some good ones that I want to share with you.  So sit back, relax, and sink your imagination into these juicy recipes.  Just don't drool on yourself!  Go ahead and copy these recipes if you want.

  •  Grilled Chicken Divine

    Ingredients
    4 to 6 Chicken Breasts
    4 cup Broccoli
    4 tbsp Butter
    1 cup Mozzarella*, Shredded or Cubed, Fresh
    4 oz Parmesan, Grated or Shredded
    2 oz Romano, Grated or Shredded
    2 oz Cheddar, Shredded
    8 oz Sour Cream

    Grill the chicken breasts with you favorite seasoning. Steam broccoli. Once cooked, cut chicken and broccoli into 1" bites. Melt butter in skillet. Mix chicken and broccoli in butter on low heat for a few minutes. Remove chicken and broccoli and place in 9x12 casserole dish.

    Mix mozzarella, parmesan, romano, sour cream in skillet with remaining butter and let melt. Pour over broccoli and chicken. Sprinkle cheddar over top and place in oven at 350 degrees or on closed grill for 30 minutes. Serve and enjoy.

    For extra fat man yum, roll biscuit dough into long , thin strips and work into cheese mix before cooking.

    *Quesadilla cheese can be used in place of mozzarella.


    tailgaters fun
  • The World’s Best Hoppin' John Recipe
    The title pretty much tells it all

    2 ½ cups Dried Black-eyed Peas

    2 cups Uncooked Long-grain White Rice

    2 large Ripe Red Tomatoes, Chopped

    1 pound Thick-cut Slab Bacon

    1 meaty Ham-hock or Seasoning Pork

    1 large Yellow Onion, Chopped

    1 medium Vidalia Onion, Chopped

    1 medium Bell Pepper, Chopped

    4 cups Chicken Broth

    1 stick Unsalted Butter

    1/3 cup loosely packed Light Brown Sugar

    ¼ BBQ sauce (sweet, ketchup-base type is best)

    1 teaspoon Louisiana-style Hot Sauce

    1 teaspoon Garlic Powder

    1 Beef Bullion Cube

    1/4 teaspoon Red Pepper Flakes

    Salt and Black Pepper to Taste

    Sort and clean dried peas. Soak peas for about one hour, rinse, and drain. Place black-eyed peas in a large pot over medium-high heat and cover with cold water. DO NOT salt water and bring to a vigorous rolling boil. Remove pot from heat. Cover and let it stand about an hour and a half. Drain and rinse beans in cool water.

    Set aside one strip of bacon. Using your BACON BOSS, cook the remaining bacon on grill, basting with BBQ sauce until slightly crispy. Remove to plate covered with paper towels and drain. Let bacon cool and then chop into small pieces.

    Using a skillet, cook the one piece of bacon that was set aside until it is about halfway done, using medium-low heat. Add and melt the butter in the pan with the bacon, then add the bell pepper and yellow onion. Cook slowly until the onion is nearly clear, add the bullion cube and dissolve in the butter while stirring. Add a small amount of water, then mix in the brown sugar and dissolve. Once bullion and sugar are both dissolved, set skillet aside.

    Using a large pot, add together the black-eyed peas, tomatoes, ham hock, Vidalia onion, and red pepper. Add chicken broth and bring to a boil. Reduce heat to low and cook for about 2 hours.
    Remove ham hock and cut meat into bite-size pieces. Return hock meat to pot. Stir in the bacon/butter/bullion/sugar mix from the skillet and mix well, stir in the rice, add the garlic powder and hot sauce, cover, and cook 20 to 25 minutes or until rice is tender and liquid is absorbed. Remove from heat, top with BBQed bacon pieces and season to taste with salt and pepper.

    Makes 8-10 generous servings.

  • Barbeque & Cheese Puffs
    The best use for leftovers ever

    1 lb Pork/Chicken Barbeque, not too heavily sauced, fully cooked and finely minced
    2-8 oz packages Cream Cheese
    1 Medium Onion
    1 tsp Louisiana-Style Hot Sauce
    ½ tsp Garlic Powder
    ½ tsp Mustard Powder
    Salt & Pepper To Taste
    4-8 oz packages Refrigerated Crescent Roll Dough

    Finely dice onion and cook over medium-low heat, adding salt and pepper to taste, until it is transparent. Soften cream cheese in a large bowl, stir in hot sauce, add garlic and mustard powders, add chopped barbeque and onion, and then mix well.

    Pre-heat oven to 375⁰. Open dough packages as needed. Roll out one large sheet of dough per package. Cut each of the four sheets into squares that are roughly 2 ½" by 2 ½". This will produce 40-50 squares total. Place a small portion of filling mixture in a dough square. Fold in the four corners of the square to cover filling and pinch slightly to make a good seal. Make sure finished dough ball is fairly round and place it pinched side down on a non-stick cookie sheet. Repeat until all filling and squares have been used. Dough balls will "puff" once they are heated. Be careful not to overcrowd cookie sheet or puffs may stick together during baking.

    Bake puffs for 20-25 minutes at 375⁰ or until golden brown. This recipe can also be performed outdoors using a skillet and a Dutch oven or your Luau Grill. Makes 40-50 puffs. Puffs may be served alone or with condiments such as Chinese duck sauce, pepper jelly, horseradish sauce, or conventional barbeque sauce.

  • Seafood Onion Bowl

    Ingredients:
    1 oz White Wine
    4 large Onions (Red, Yellow, Or White)*
    6 oz favorite Shelled Seafood (Shrimp**, Scallops, Lobster, Crab)
    2 oz Bread Crumbs
    2 tbsp Butter
    1 med Red Pepper (Bell or Chili)
    1 med Green Pepper (Bell or Chili)
    1 tbsp Sweet Paprika
    1 tbsp Minced Garlic
    1 tsp Salt
    1 tsp Rosemary Olive Oil

    1 medium bowl
    Tin foil

    Fine chop seafood and peppers. Set onion flat side down and cut off 1/2 of top section. Set aside. Making sure not to cut the two outside layers, make an X shaped cross-cut approximately 1 inch deep in the onion. Scoop out the middle of the onion and set aside. This should create an onion bowl. Repeat with all onions and set bowls aside.

    Fine chop the section of onion removed from the bowl. In a medium bowl, combine the remaining ingredients and mix well. Spoon mixture into onion bowls.

    Set onion top back onto onion bowl. Wrap in tin foil and place in oven at 350 degrees, or set on top of grill. Cook from 45 minutes to 1 hour. Serve and enjoy.

    *Instead of onion bowls, this recipe can be prepared in almost the exact same manner using bell peppers

    **If using shrimp, shrimp should be cooked and peeled ahead of time, or use peeled baby shrimp. Use Vidalia onions and 2 tbsp of shredded coconut for even better results.

Eat Drink and Be Merry:

These are a few of my favorites.  These should be enough to keep your palette working for awhile.  I hope you have a fun filled, food filled time at your next Tailgate Party.


Thanks for coming by...


Tuesday, April 5, 2011

Firearm Safety and Target Shooting for Children

Dad means what Dad says

I remember when I was about 10 years old, and began bugging my parents to let me have a BB Gun. When I first asked them for one they were kind of astonished. Well they looked at each other, then looked back at me, then looked at each other again.

child target shootingThen my Dad said "why do you want a BB gun?" I responded "Oh I don't know, to go target shooting, a lot of my friends have one why can't I?" Dad came back with "I'll think about it and let you know!" I must of got the ok, cause the following Christmas I got my first Crossman CO2 cartridge BB Rifle. Remember those?


Upon removing that rifle from its box and examining it along with my excitement, Dad said "listen to me very carefully, I don't ever want to know or hear of you pointing that gun at anyone ever, do you understand me?" I said "yes I understand Dad!"

So I began to learn all I could about the rifle and taking it apart and putting it back together again and all about how it worked. You see back in 1969 they didn't have the internet. Or anything other than a library to go and find anything about firearm safety or target shooting for children. It wasn't even taught in school.

Its better today than it was

Today we have the greatest library in the world right at our fingertips. Children today have a far greater advantage then I did at 10 years old.

I want to give you in this article some tips to firearm safety and target shooting safety specifically aimed at children.

Train up a child in the way he should go

How old should your child be before you begin training them and teaching them proper firearm techniques? That depends on your wants, your individual understanding, and your desire to allow your child to have a firearm of some type.

At about 10 years old or so children have enough reasoning ability to understand basic safety precautions of firearms. Encourage your children to learn these safety rules, and to follow them. One method that helps is to take them to the shooting range (once they are old enough to handle a firearm) and let them shoot.

Another method is to use airguns in early training and safety education. This will not only further strengthen the other lessons, but will also serve to remove the mystique that has been put up around firearms. It is this mystique that leads to most firearms accidents today.

Always think safety

Child Shooting


If your children know that you have gun, don't try to hide the gun in the house, thinking that the child will never find it. They will. Children have the ability to find anything adults can hide. And, the better something is hidden, the harder the child will look for it, and the more importance it will have to the child once it is found. The solution? Get a Gun Safe!!

If your children have had toy guns they need to know the difference. A firearm is not a toy. Do not treat it like one. Let them know that firearms are capable of bodily injury, destruction and possibly death if misused. Do not "soft-soap" the truth.

Start your children off right by showing them the ropes about guns. This includes showing them the proper procedures for unloading, verifying and handling a firearm. Where available, a certified instructor should be used to teach proper shooting and safety techniques.

Teach them how

Make sure to show your children how to clean and care for a firearm. A dirty, or abused gun is more dangerous than any other. Teach them that firearms jam sometimes and therefore become dangerous. Show them the difference between automatics, semi-automatics, and revolvers. Rifles, shotguns, etc...

Remember, nothing is as good as education, and open, honest discussion. Be sure to follow all of the rules you set for your children. If you violate any of them, the child will feel uncomfortable in following your example.

If you take them to a shooting range you can find instructors there to help in training them also. Show them the proper safety rules at a shooting range. Let them know that when the range instructor says "Cease fire" that means to lay the firearm down and step back away from it.

Teach them to listen

Only when the instructor says "commence firing" do you step back up to the firearm and pick it up. At the range you show them all the proper etiquette of the shooting range. If you don't know these things then you and your child will have a good time learning them together.

At the target shooting range it makes for great bonding time between parent and child. Not to mention very fun and exciting. Let your child see all the different types of targets to shoot at that are available at the range also. You can even get printable targets right here on the internet to use.

Another good place to get a good understanding of firearm safety and target shooting is to get your children involved in Cub Scouts, or Boy Scouts...even Girl Scouts.  In these great organizations they can learn about other types of target shooting such as Skeet Shooting, Trap Shooting, etc.. As well as hunting.

Finally 

Eddie eagle
If your children are under the age of 10 and you would still like to get them involved in learning about firearm safety and target shooting, you can do so at the NRA's (National Rifle Association) Eddie Eagle GunSafe® Program.  Click here to go there.

Thanks for coming by...


Friday, April 1, 2011

How To Test the Strength of Your Attic Ladder

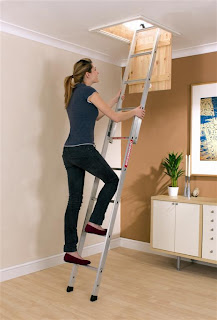
attic or loft ladderAttic Ladders are a great convenience to the homeowner. They are so convenient that its just a matter of pulling on the draw string and pulling it down for use. Most of them are in 2 forms, fold out and extended.


If they are constructed well, they provide years of safe service for the homeowner. However over time, from the constant heating and cooling, with humid and dry conditions, causing contracting and expanding, they can become corroded. Its construction can become loose and flimsy making the attic ladder very unsafe.

NFPA knows best

I would like to give you some ways to test the strength of your attic ladder in this article. I can't think of any better place to find the info for testing your attic ladder than the NFPA. (National Fire Protection Association)

If its good enough for the NFPA, then its good enough for you and me. Firemen probably use ladders more than anybody, except for maybe construction workers. We can adapt some of their quality safety standards for use in our own homes for maximum safety.

I will only be giving some important points from that list. You will be able to see how you can adapt them to your circumstance with your attic ladder in your home. These testing strategies will be gleaned from the NFPA's Ground Ladder Inspection and Maintenance. To see them all - go here.

Most attic ladders come in 2 types of construction. Wood and aluminum. Rarely would you see them in fiberglass. So let's have a look at the ways to adapt and test the strength of our attic ladder from the best source of all - the NFPA:


Check and test -

  • All rungs, for snugness and tightness
  • All bolts and rivets, for tightness; bolts on wood ladders, for snugness and tightness without crushing the wood
  • Welds, for any cracks or apparent defects
  • Beams and rungs, for cracks, splintering, breaks, gouges, checks, wavy conditions, or deformation
  • Rungs, for punctures, wavy conditions, worn serrations, or deformation
  • Surface corrosion
  • Labels present and legible
  • Ladders clean with no buildup of grease, dirt, or grime on the beams
  • Gouges and Dents
Remember these are just some of what a fireman goes through to maintain their ladder safety and for those they rescue. You gain a whole new respect for your Fire Department when you see what they do in this capacity. And they do this on a regular basis.
attic ladder
Do we need to test our attic ladders on a regular basis like a Fire Department? Well, probably not like their regimen. But I would say at least twice a year. Particularly if you use yours on a regular basis.

Summation

Folks, it doesn't take a long time to be safe and check these things. Especially in your home and primarily for your other family members. Just know that the probability goes way up every time you get on a ladder to get bodily injured.

Take a moment for your betterment. Adapt these tips to your attic ladder and all your ladders for that matter. Remember, if its good enough for the Fire Department, then it's good enough for you and me to.

Thanks for coming by...